|
Today I'm going to share with you the watercolor supplies I purchased to start watercolors as a hobby!
If you want to check out some of my work, or purchase affordable prints, check out my shop here! 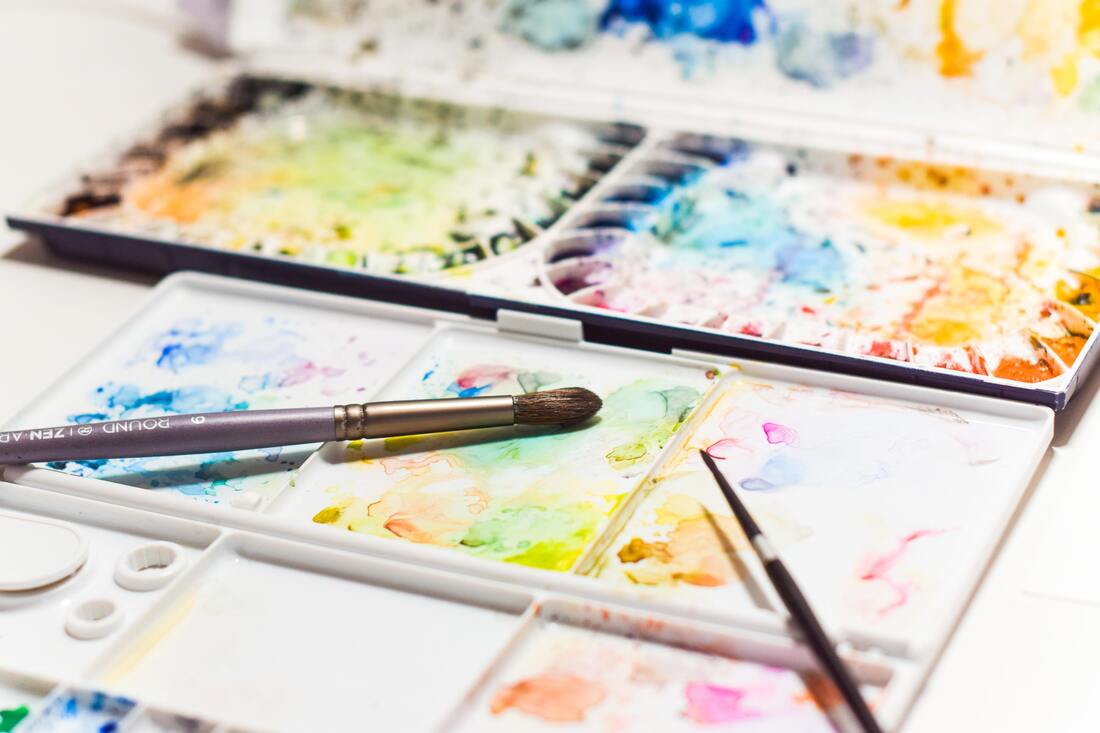
My Supplies:
Paper.
Watercolor paper has a specific texture and porosity that you will want to have versus a regular printing or sketching paper. This is so that the paint will blend, dry, and move along the paper in a desirable way. Here are some beginner papers I started with. I do most of my paintings in my sketchbook as this is my favorite way to paint, but I love the postcards if I want to give it as a gift, and the large sheets for bigger paintings.
Paints, Brushes, and Palettes I knew that I wanted a higher quality paint and brush than what I had used growing up, but I wasn't ready to make the investment into the extremely expensive paints and brushes I saw at art shops. I did a lot of research and chose these affordable options that I thought would give me the look I was after. I am VERY satisfied and so far have no reason to upgrade! I actually ordered the watercolor palette much later, when I realized I could mix my own colors and save them to use in future paintings. I now have this case with a ton of slots I can mix colors in, then I just let them dry up and next time I want to use them, they are ready to go with the stroke of a wet brush!
Extras Here are a few extra fun tools I've picked up as well! The gold, white, or silver pens to add details on top of my watercolor paintings. The brush pens for watercolors on the go, or a fast "sketching" style. And masking fluid which you can paint onto the paper, and then peel off after your watercolor painting is done, leaving the untouched paper where it was left, paint free!
0 Comments
Written for, and posted on, Ember & Solis. As creatives and as entrepreneurs we have special circumstances we need to prepare for. The harsh reality (that many of us have begun to face head on during the COVID-19 crisis) is that in our field, we have the potential to be without income for months or longer at any point in our careers. The stress and hardship this can bring on hits to the core. It hurts. I hear you. If you had 6 months to a year of income saved up for this moment, things would be less stressful, a bit easier to cope right? That would be ideal, but the question we hear so often is “How is that possible!?” We have student loans, bills to pay, investments we need to make in our business. Today I’m going to walk you through a budget plan to get your finances in order so that the next time something like this happens, you will be ready to face it head on. 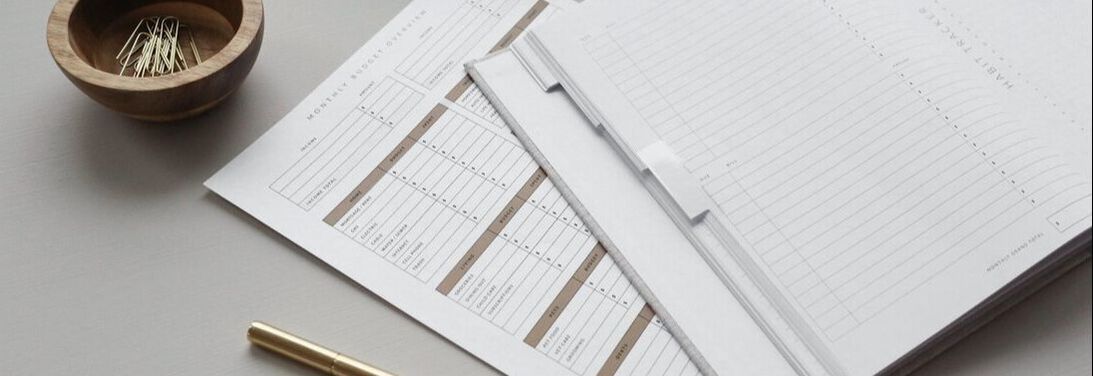 Part A : Build your Reserve The first phase I recommend, is to put any extra money into a savings account reserved for emergency situations. “Wait.. shouldn’t I focus on paying off my debt faster or investing in my business first?” Here’s the harsh reality. This is not the first economic recession, and it won’t be the last. We experienced one in 2008, and here we are again. As an entrepreneur or creative by choice, we have the risk that during an economic downturn we may not have income for months, for a year even. The risks are very real and they are outweighed by many rewards of owning your own business, but the risks need to be managed. That’s why I’m recommending you build up a savings account before focusing on other areas of saving and spending. What does this look like? First, calculate your expenses each month. These are mandatory things like rent, electricity, food, minimum payments on any debt, and gas. If you had no income - how much money would you need to make it a month? Now multiply this by 6-12 months, and this is your goal. If you don’t have this emergency fund saved yet, I recommend not paying extra on loans (make the minimum payment only), and not spending on things you don’t need (clothes, that new car, that new lens for your photography business that you might not need, etc). This emergency fund is going to be what may get you by one day, so this is your priority. Set aside as much money as you can each month until you reach your savings goal. Put this money in its own special savings account so it wont be spent on other things later. Try to find a high yield savings account so that you can collect the highest interest rate on it. 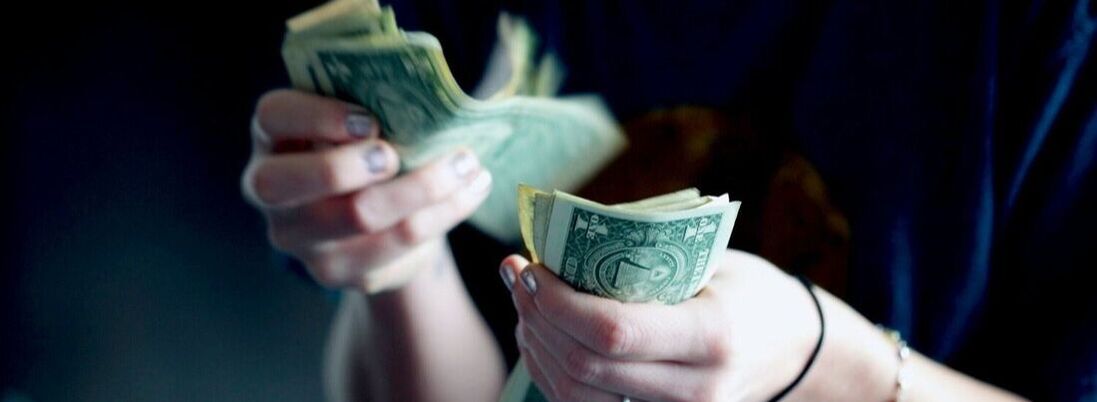 Part B - Pay off debt Once you have your emergency fund of 6-12 months in a savings account, do not touch it! Congratulations, you are now prepared for a loss of income from 6 months to a year, an amazing security to have for yourself - this is huge! You can lighten up a little on spending now, and allow yourself to buy a few non-essential items while you focus on paying down your debt to zero. The approach that I think makes the most sense to pay off debt (and actually stick to it) was actually promoted by Dave Ramsey, and it’s called the “Snowball Method”. Here’s how it works! 1. Make a list of all your debt (credit cards, student loans, car loan, mortgage, etc). 2. Continue making the minimum payments on all of your debt. 3. Now, which debt has the smallest balance (For example, maybe this is a credit card with a $3500 balance?). You are going to pay whatever extra you can on this each month. So for example if your minimum payment is $100 and you have $500 extra you can spare each month, you are going to pay $600 each month on this debt until it is completely gone. 4. One down? Congrats! You’re knocking them off the list! Now, what is the next smallest debt on the list? Go ahead and take the amount you spent each month to pay off the debt in step 3 ($600 in the example in step 3) and pay this as an extra payment each month until it is completely paid off. So for example, if your next biggest debt was a car loan for $10,000 and your monthly payment is $200, now you are going to pay $800 each month ($200 minimum + $600 extra). You are still paying the exact same amount on debts as last month, but since once debt is gone - you are putting all of that towards another debt. 5. Two down? What an amazing feeling that will be! Continue this process on the next biggest debt until you are officially debt free. Why does the Snowball Method work? By working from the smallest debts to the larger debts, you have milestones to celebrate which psychologically will help you keep to your goal. Once you have paid off your debts you can lighten up even more on spending and allow yourself to start purchasing more fun items each month.  Part C - Save for Retirement If you’re not employed by a company who helps put money into your retirement account, odds are you have to be the one who puts together a plan for the money you will need to retire. Relying on social security, a partner, or others to support you in the future is not as wise of a decision as taking this into your own hands. As a creative, or entrepreneur, you will want to start setting aside money every month so that when you are ready to stop working, you will have a bucket of money to live off of. You will also want to invest this money so that it grows year over year, meaning the earlier you start this, the more your money will work for you! Mutual funds are a great way to invest your money because they are less risky than buying stock from a single company. A good mutual fund should give you an 8% increase or more (average) on your money each year, over the long term. Another great thing to look into when starting your own retirement account is a Roth IRA. By paying tax on the money you put into the account today, you won’t have to pay tax on the (much larger) amount you pull out when you are ready to retire. I highly recommend researching a Roth IRA and seeing if it is the right choice for you. There are many websites such as Fidelity, that can help you get started with a Roth or regular IRA account, which you can contribute money to each month, and invest based on the level of risk you are comfortable with.  Since a young age, I have been focused on saving money, having multiple streams of income, keeping debt to a minimum, and building assets. This structured approach has worked for me but may not work for everyone.
This content is for informational purposes only, you should not construe any such information or other material as legal, tax, investment, financial, or other advice. This post was written for and posted on Ember & Solis. How changing tiny daily habits will dramatically change your future When we picture a better future for ourselves, we often see the "big steps” needed to get there. But what if reaching your future goals wasn’t done in a matter of big accomplishments, but rather in tiny changes to your daily life? Luckily for us, this is exactly the case. Overtime, small habits compound into incredible results. It could be over months, or even years, which is why we tend not to focus on these tiny changes. Imagine if you improved just 1% each day, where would you be in a year?? 10 years? 20 years? You would probably see some BIG results. Now imagine if you made a 1% decline in your habits everyday (food, exercise, reading, learning, work ethic). Again, you would probably see big results, but they would not be aligned with the future you wanted for yourself. This is why making sure your daily habits are aligned with your future goals is so important. Our brains crave completing easy tasks with instant gratification, and we have the ability to design our environment in order to encourage tiny changes to our behavior, which overtime will lead to massive results. So lets get started talking about how you can change your environment, to encourage better habits, and change your life. How to change your environment to encourage better habits
Attaching Rewards to Positive Routines Many small tasks we need to do to reach our “rewards” do not give us instant gratification. For example, eating healthy for a day will not give us our dream body right away, and being more productive during the day will not automatically make us more money. By attaching instant rewards to these positive activities we can encourage ourselves to have better habits & routines. Here are some examples. If your goal is to exercise for 30 minutes a day, you could reward yourself with a smoothie after you complete your exercise. Similarly, you could allow yourself to watch Netflix only while on the treadmill. In another example, if you want to save money to go on vacation, each time you pass on going out for dinner or drinks, and instead do DIY, you could put the money you would save into a savings account or jar immediately, so you can see the results ASAP and watch them build over time.
Another way we can manipulate our environment is to change our visual cues. This could be as simple as putting your gym bag by the door, keeping the book you are studying by your bed, or stocking your fridge with healthy food and drinks instead of soda and junk food. Replace poor routines with better routines If we keep the habit loop in mind (cue > routine > reward), we know that if we can replace a routine with a healthier one that yields the same result, we can dramatically change our life over time. For example, if you go out for beers after work every day with a coworker to “let off steam” (cue = the stressful work day is over, reward = endorphins and social activity), you could ask the coworker to engage in a healthier routine with you each day. This could be a walk along the water, a bike ride, or heading to the rock climbing gym. The reward would stay the same, but by changing the routine, overtime you will see great changes to your health.
Start Small Remember how we are far more likely to stick to a habit when it requires less energy? By starting small, we are more likely to stick to a new habit. Here are a few examples. If your goal is to do the splits, you are much more likely to stick to your habit and reach your goal if you commit to stretching for 3 minutes everyday versus 15. Similarly, if your goal is to read a book to learn a new skill, you are far more likely to stick to this if you commit to reading 20 minutes a day versus an hour. Remember that small daily changes lead to big results, and implementing these tiny tweaks to your day just may mean the difference between reaching your goals or not. Thanks for being here, I’d love to hear your thoughts!  I recently switched back to a Dell XPS, in search of a computer with the most RAM and best SSD I could find. However, as a content creator and photographer I quickly realized that photos on my new computer screen looked NOTHING like they did in print, on my phone, or on other computers. The screen was VERY vibrant, over-saturated, and orange. The problem with this was when I was editing photos, they would look great on my computer, but when I exported them they looked really dull on other devices (skin tone looked grey instead of warm). This was obviously a huge issue for me to resolve, as I would never want to send photos to a client that didn't look great on their own device, or in print. I have tried monitor calibration tools in the past and did not like the result. Instead, I take the approach of checking my photos on other devices and in print periodically to make sure that they look consistently good in those forms. So basically I was just looking for a way to turn down some of that saturation on my new Dell XPS. Dell has a solution for this, as I soon found! It is called Dell PremierColor, and you can download it here from their website. 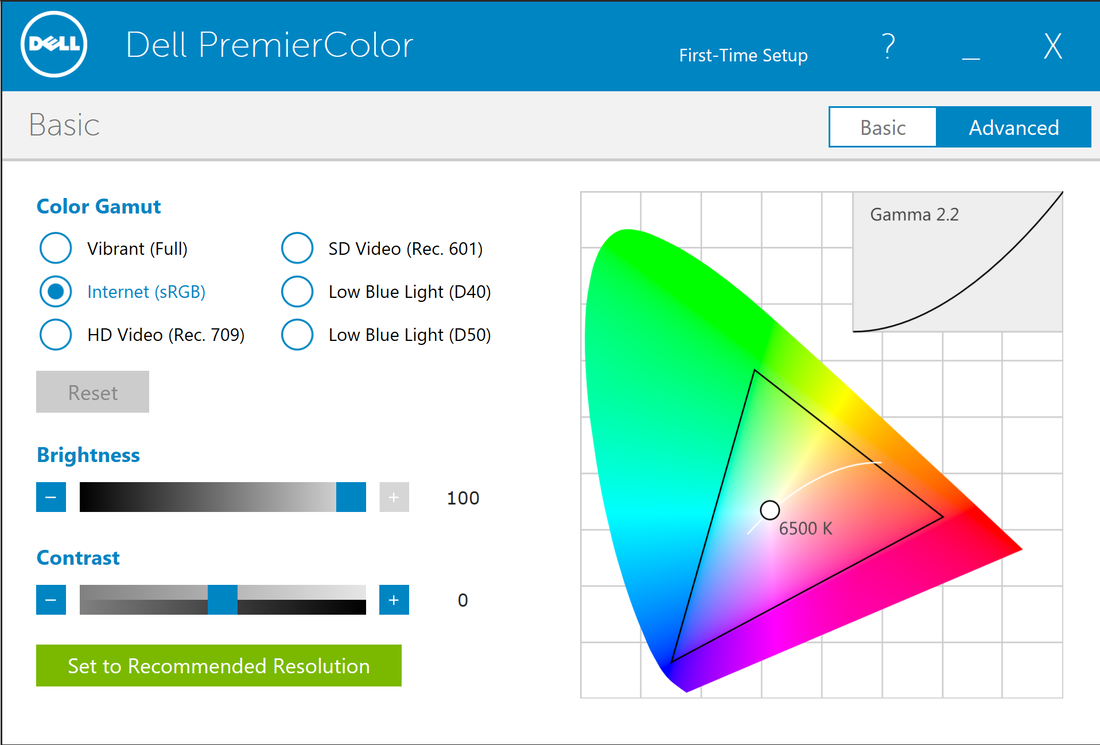 When I first opened up the tool, the Color Gamut was set to "Vibrant (Full)". I switched it over to "Internet (sRGB)" and instantly all the issues I had were gone! There are also settings on here to limit blue light which is great for nighttime browsing.
Hope this is helpful if you were having the same issues I was! <3 Lindsey Beginner Video Editing Tutorial
Need: Adobe Creative Cloud membership (or trial) to get Adobe Premiere Pro Have you ever wondered how to make a video clip that is shaky into one that is smooth? Sometimes I get into a situation where I don't have a gimbal but ended up filming a small clip of a vacation or a photo shoot that I want to later use in a video. Because I was hand holding my camera, it is often shaky and moving around a lot which is super distracting and not a pleasant viewing experience. I'm going to teach you a super quick way to FIX that in Adobe Premiere Pro!
The next step and tip I would suggest is rendering these clips. Depending on what you have done to other clips in your timeline you may want to render them as well. On your timeline right under the numbers, you should see red, yellow, or green bars for each clip. I recommend rendering any clip that is yellow or red, but especially red. This will allow you to playback the clip (with any effects including the warp stabilizer above) without freezing on your computer screen.
Enjoy! Interested in what my photos look like before I edit them? Check out a few examples. For these images, I applied one of my lightroom presets I have made (basically a copy of my settings to save time) and then adjusted the exposure and white balance to fit the particular photo. All in all, it takes about 20 seconds. If I choose to edit skin, eyes, or other parts of a portrait, this would take additional time and I usually prefer to do that in Photoshop. If you are interested in my Lightroom presets, you can find them for sale over in my shop, for $20 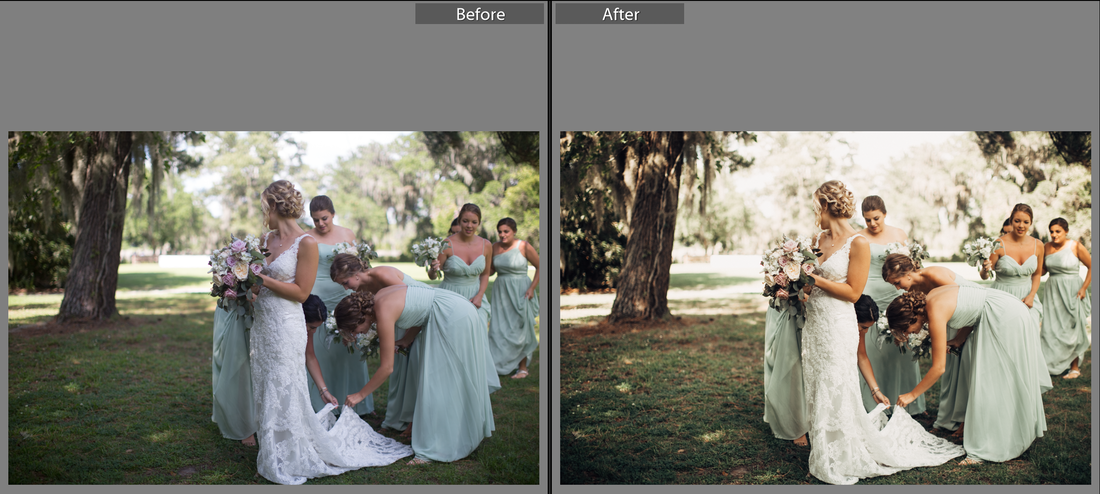  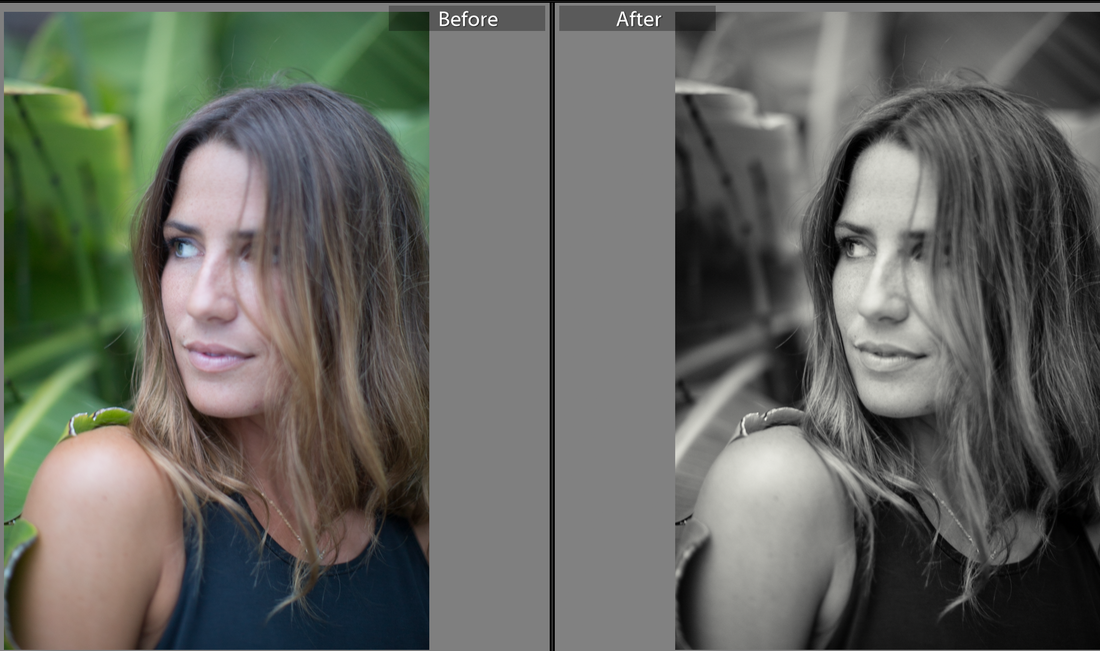 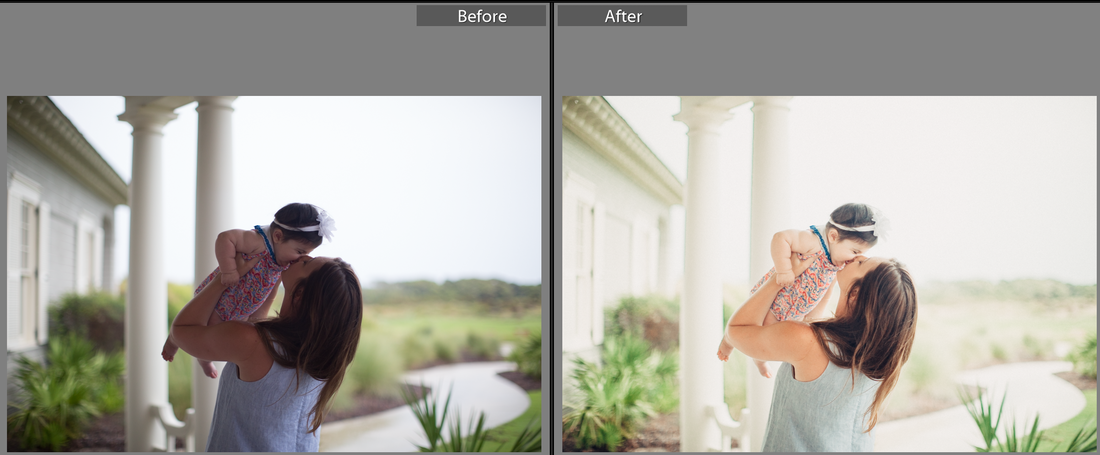 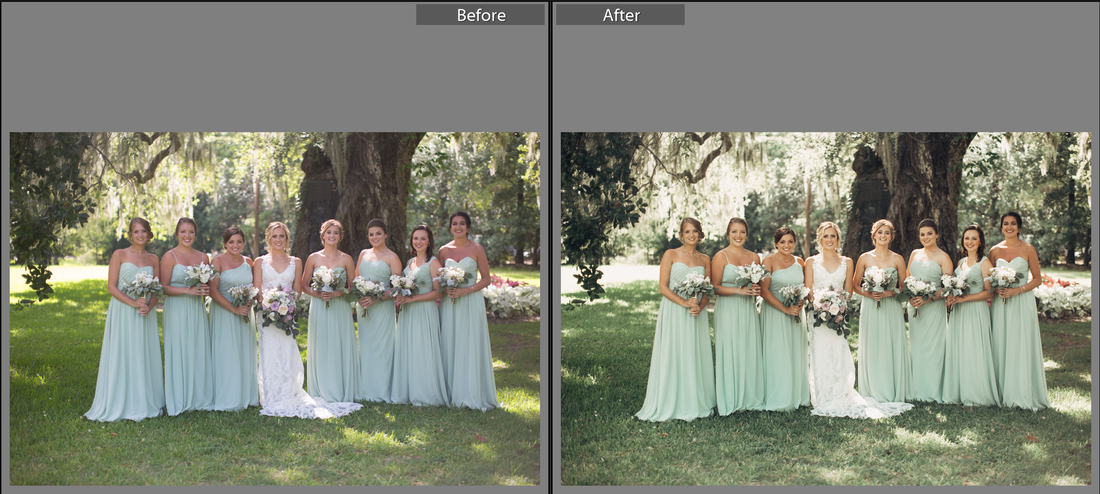
Below is a list of the equipment I use. (Updated in July 2017)
All photos are active links to products on Amazon prime (Cheers to free 2 day shipping!)
Becoming an official business is tough work! Just when I had everything down after a year operating in Seattle, I moved to Charleston. Things here are much more intensive. Here are some of the things I had to do, and what I learned along the way forming my LLC.
Disclaimer: This is not legal advice. This is simply what I did to start my business and it may vary and/or change.
In the world of photography, packages are sold for $xxx and this could or could not include sales tax. Being specific with your customers is a must!
For me, I choose to have my sales tax included in my prices so that there are nice round numbers for what has been paid and what is owed. To do this, you may charge your package amount (lets say it's $100) and calculate & pay your sales tax after the fact. Here's an example of how you would do that: Lets say you have a total sales tax rate of 8% for a purchase of $100. To figure out what the sales tax would be, complete the following steps:
You can use this method with other rates by replacing the "8". Let's say you have a 9% sales tax rate, then you would divide by 1.09. *Update* Apologies for a previous typo indicating 95.59 instead of 92.59 |
Traveling Wedding, Elopement, and Brand Photographer based in the PNW. Learn More!
Lightroom Presets
Edit your photos in just a few clicks with the Creative Wanderer presets, focused on skintone and adventures! 
Check out my eBook to learn how to choose camera gear that’s right for you, what all those numbers mean, how to shoot in manual mode or select the appropriate settings, and how to edit your photos
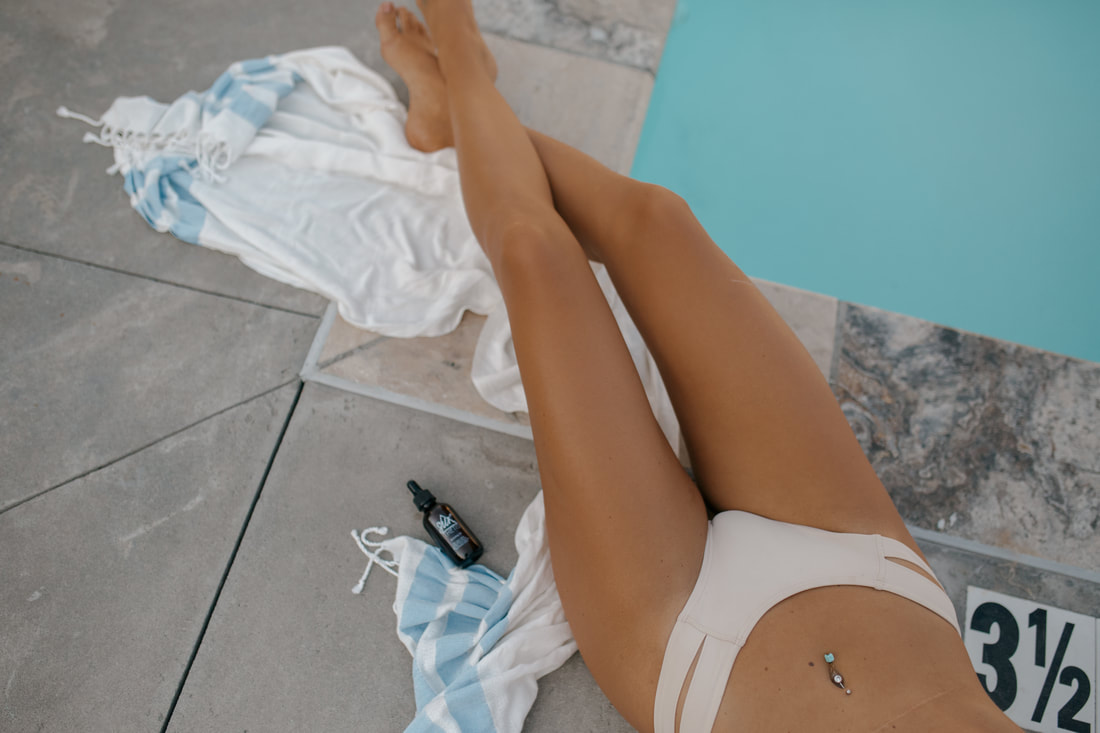
Sunthetis Skin
For those of you who want darker skin while keeping your sheets white, check out SunThetis lemongrass sunless tanning water! It goes on clear and has antiaging peptides! Be sure to check out their sunscreen pencil, the worlds first and only way to protect freckles and design on your skin. 
(Travel (photos)
|